Basic printing
IDM has a Riso SF 9450, printer. The manual for this machine is available here. The video documents the basic printing process and was prepared by Andrew Lau.
For more information and tutorials on the print lab see the website here: https://wp.nyu.edu/printlab/risograph/
Go here to book appointments in the lab.
Paper Choice
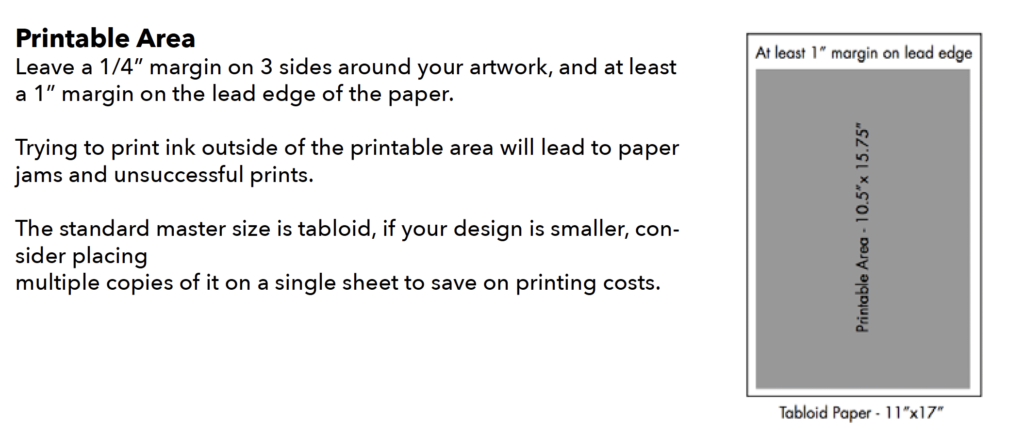
The maximum paper size the printer can print is tabloid (11″ x 17″).
The printer cannot print full bleed, so you should leave a 0.25″ margin around your image when printing. If you don’t, the printer will cut off the image.
The maximum printable area is approximately 10.5″ x 15.75″.

For more information on paper choice, read the print lab site.
File Preparation
The printer will print each color separately. Each color should be prepared as a greyscale image (these are called contact sheets). Contact sheets can be prepared in a number of ways. Either in photoshop by separating color channels into layers, or using the p5.js Riso library that lets you set up color layers, draw to them, preview and export.
Once you have your contact sheets you can either print them from the Preview program on the lab computer as you would for any other printer, or you can print them from Photoshop using the Riso driver. Using Photoshop and the driver gives you more control over the way that the image is dithered. See this guide on photoshop print and color settings.
Troubleshooting:
Roller smudges: If you don’t let your prints dry, when you refeed the paper through ink will stick to the rollers. Let your prints dry for 10 minutes before each new color. To clean the rollers, lower the paper tray, use a wet wipe and clean the two rubber rollers by rotating the wheel and cleaning while you go. Dry with a paper towel and try again.
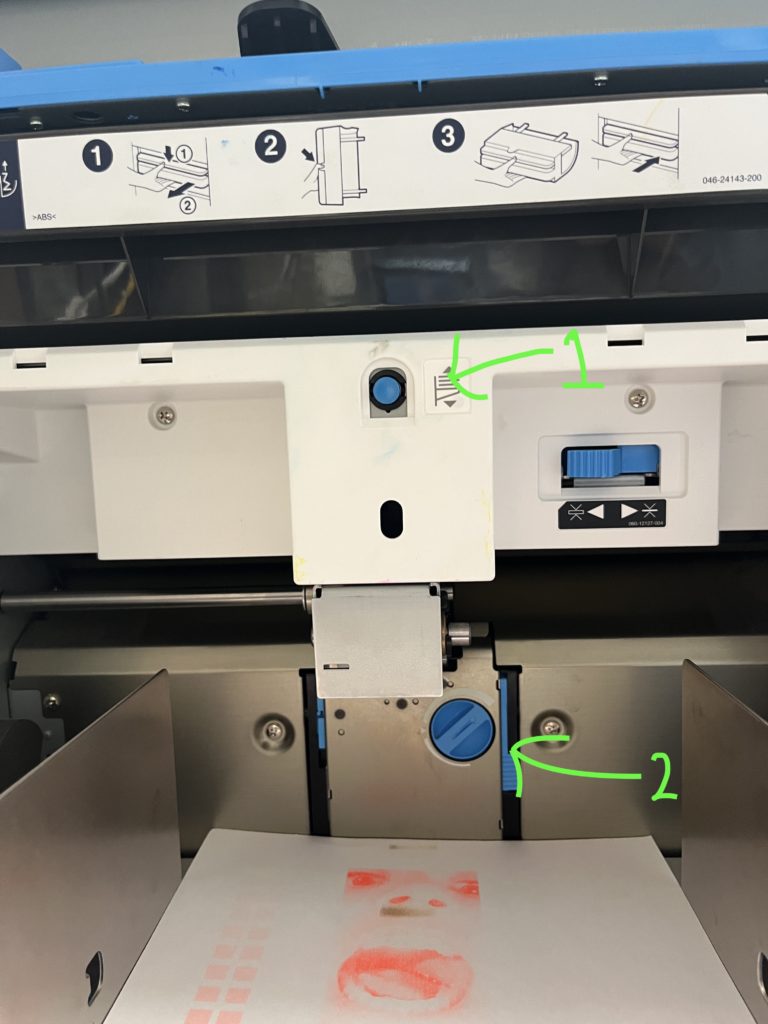
Paper jams: Paper jams often occur because of the paper weight. Lower the feed paper tray by pressing the button (marked with a 1. below). Adjust the dial according to your paper thickness (marked with a 2 below).

Refilling Ink Colors:
See the first minute of this video
Refilling the master roll:
See 1.00 minute in this video: